
I often get requests for a basic cake recipe, the beginner kind. And I suggest the easy ones in the blog – the 1-2-3-4 cake and the Ultramoist Chocolate Cake . Few days back it was kids’ birthdays and I thought why not make a very simple cake so that even newbies in baking can do it easily.. (I often get remarks that cakes in my blog are bit complicated for beginners… )
I feel happy when people make an attempt to bake a cake for their loved ones, inspired by this blog.. More than the perfection of the cake, it’s the thought that matters.. This Kitkat cake doesn’t require much icing skills and it definitely will make the kids happy 🙂
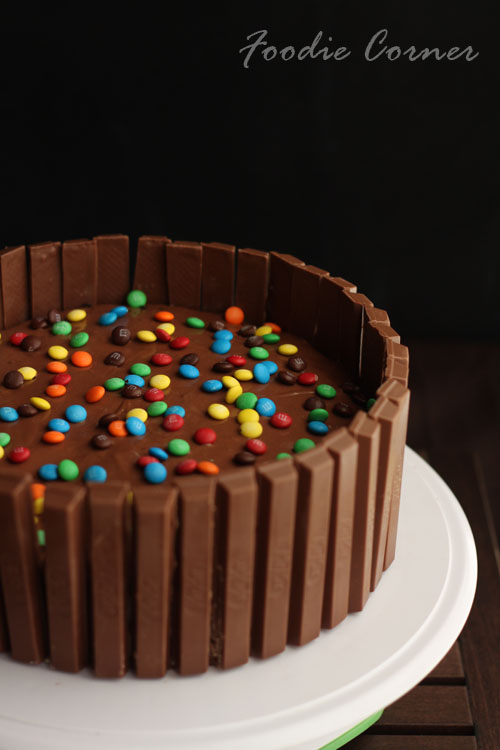
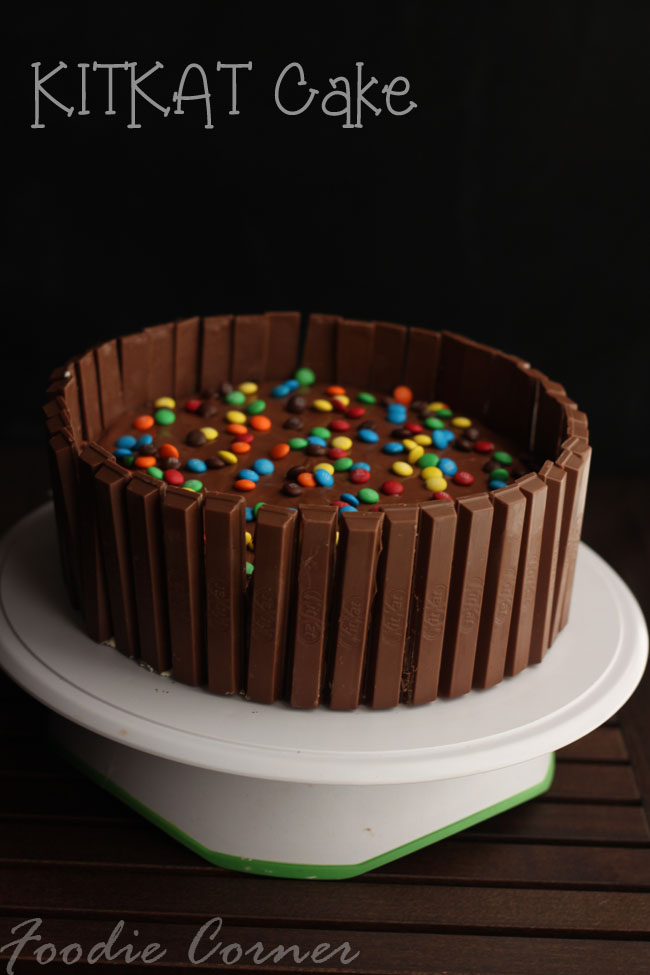
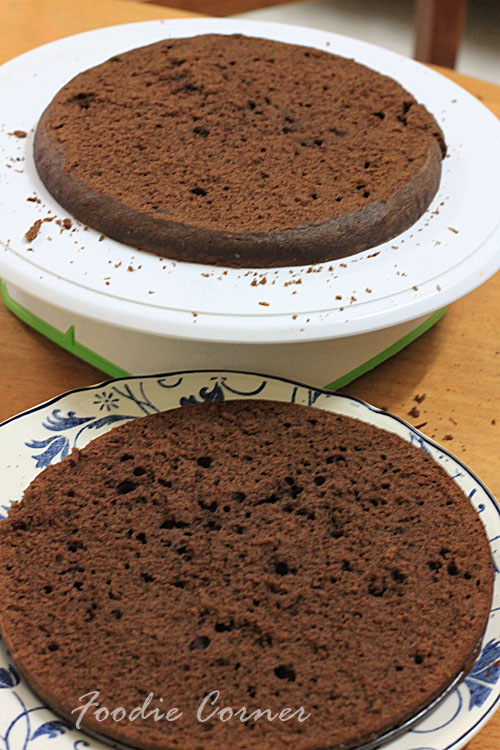
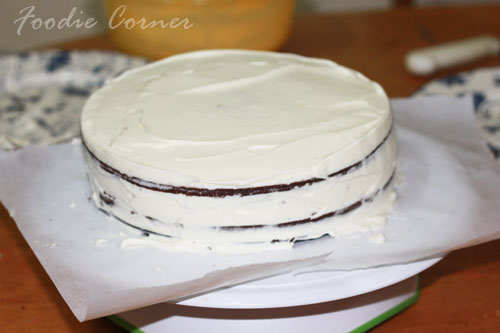
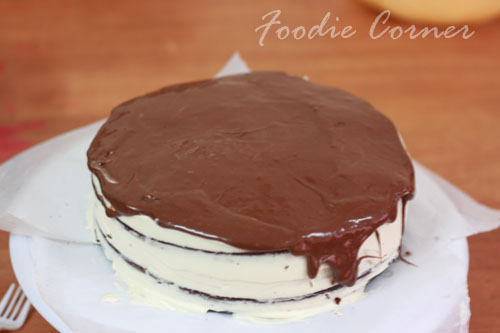
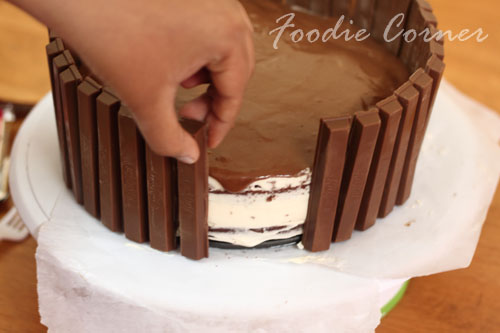
The cake is a very basic sponge cake recipe.. It calls for equal weight of butter, sugar and flour. The cake has a very light airy feel. To make the layered cake, I divided the cake into 3 layers.. You can make it into 2 also. Pour some sugar syrup to moisten up the cake. Cover the layers with whipped cream , top it with ganache and stick the kitkat bars around.. My kids join me in baking cakes now, they love to whip up the ingredients and decorate the cake. 🙂
So, without further ado, here are the step by step pics of making the cake. You can find the full recipe with ingredients and method at the end of the blog post.
TO MAKE THE CAKE :
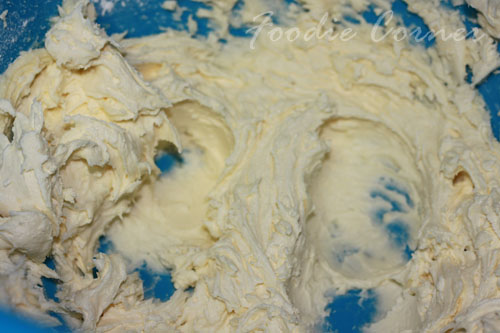
Beat the butter using the handmixer for about 1 minute till it is soft
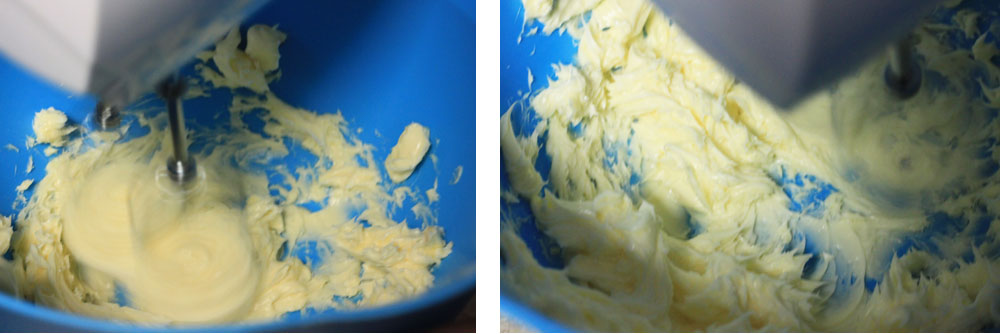
Add powdered sugar to butter and beat on high speed till it becomes creamy.
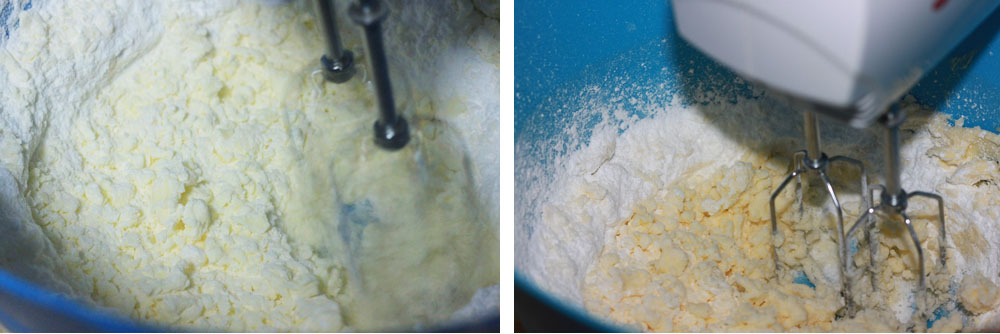
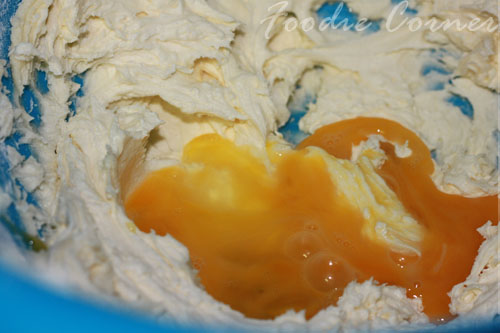
Add the eggs one by one and beat well on high speed for around 10 minutes .

In another bowl, sieve the flour, baking powder and cocoa powder.
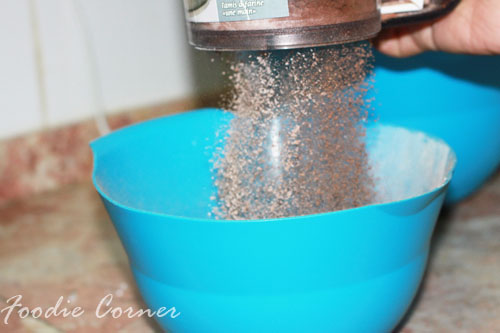
Add one third of the flour, cocoa mixture with the egg mixture . Stir with a spoon till it is well blended. Repeat this 2 more times till the all of the flour mixture is incorporated into the egg mixture.
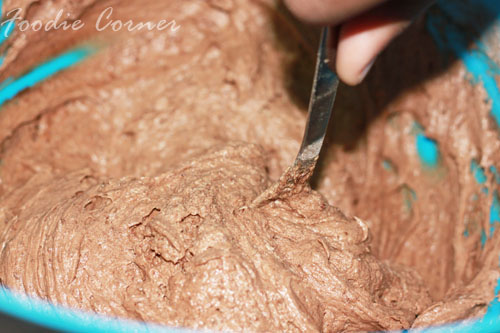
You should have a smooth thick batter. If your batter is thick , add about 2 tbsp of milk and stir.
Now transfer the batter to the pan. The batter should fill only till 2/3 rd of the pan. Bake at 180 degree for around 25 minutes . To test whether the cake is done, insert a tooth pick. If the tooth pick comes out clean ( without any crumbs on it) , then the cake can be taken out of the oven .
Let the cake cool to room temperature before applying icing.
TO MAKE THE SUGAR SYRUP:
Stir the sugar, water and essence in a small saucepan and bring to boil. Simmer till the sugar has dissolved, and cool completely.
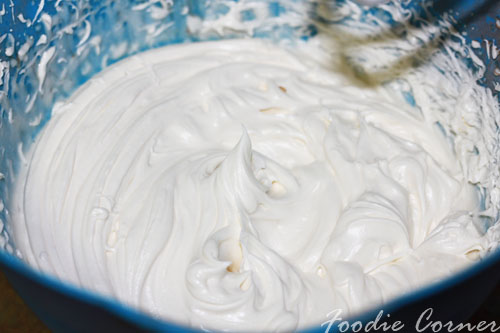
TO MAKE THE WHIPPING CREAM:
I used Dreamwhip powder. Mix the contents in 2 small sachets of dreamwhip with 1 cup cold mix and a teaspoon of vanilla essence. Beat on high speed for 5-7 minutes till you get light fluffy peaks. This will give about 4 cups whipped cream.
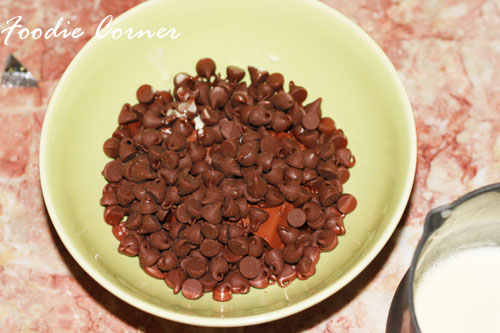
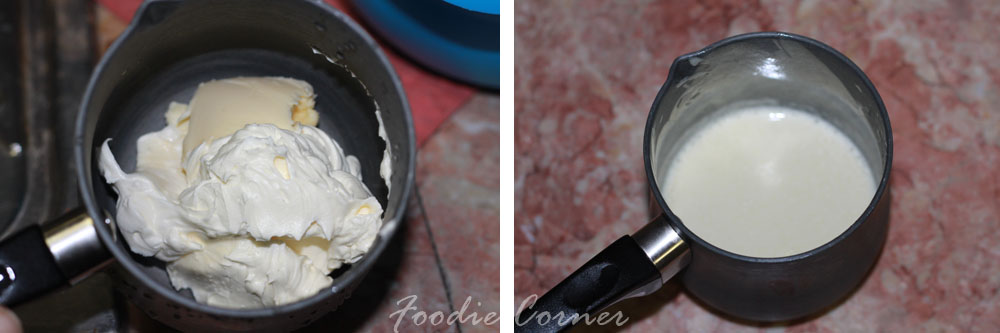
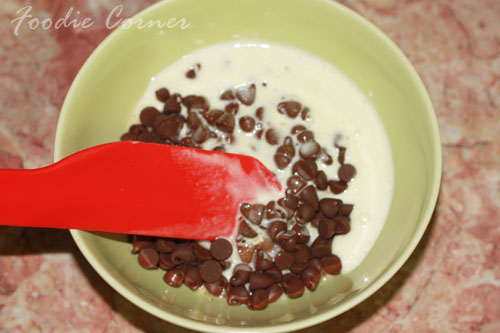
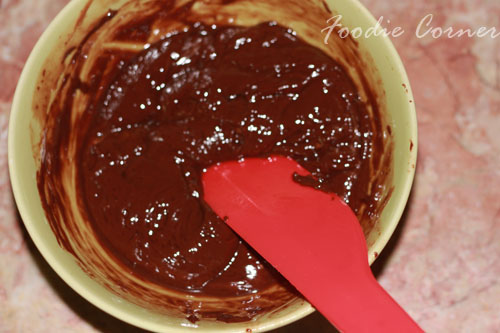
TO MAKE THE GANACHE :
Place the chopped chocolate in a medium sized stainless steel, or heatproof bowl. Set aside
Heat the cream and butter in a medium sized saucepan over medium heat. Bring just to a boil.
Immediately pour the boiling cream over the chocolate and allow to stand for 5 minutes. Stir until smooth.
When Ganache has completely cooled, beat until soft and fluffy. Then spread the frosting on top of the cake.
HOW TO ASSEMBLE :
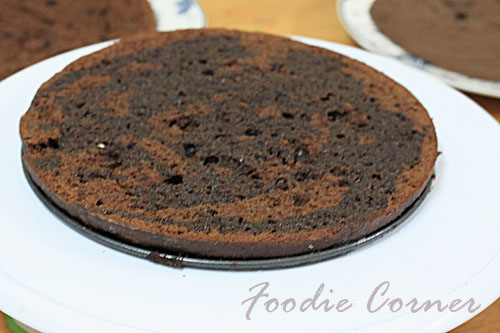
When the cake is cooled, use a long serrated knife and cut off the top to make it straight. Slice the cake horizontally into 2 or 3 equal parts..
Pour one-third of the sugar syrup on the first cake layer .
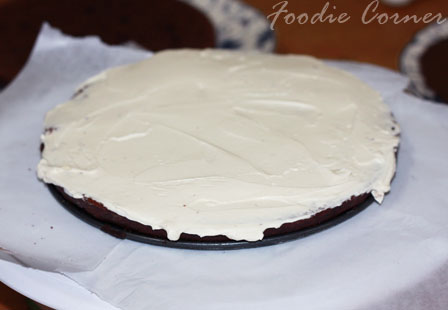
Spread the whipping cream over the first layer.

Take the second cake slice on top of the first layer . Pour one third of the sugar syrup and spread the whipped cream.
Repeat the process with the third layer.
Cover the whole cake with whipping cream.
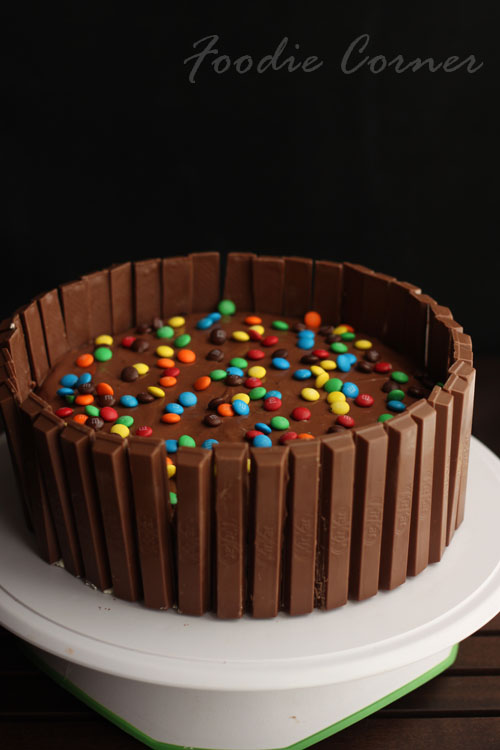
Pour the ganache over the top of the cake and spread it . Spread the ganache to the sides of the cake .
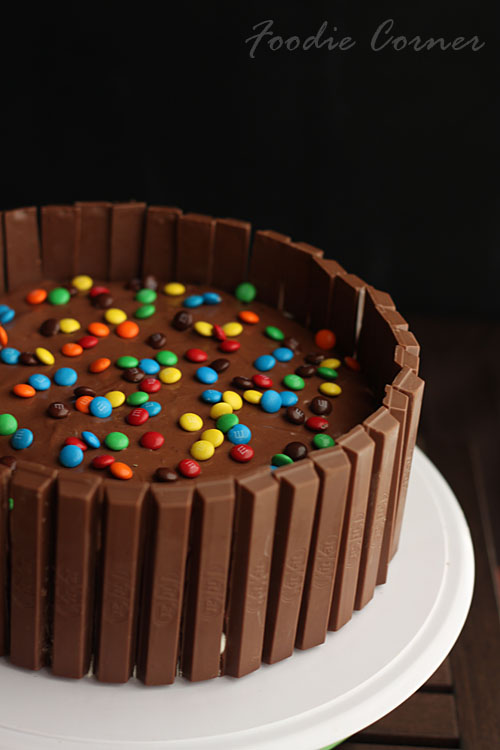
Stick Kit Kat’s all the way around the cake – they will just stick to the frosting. Pour M&M’s on the top to give the finishing touch.
I got the recipe for the basic sponge cake from here
KIT KAT CAKE USING BASIC CHOCOLATE SPONGE CAKE
INGREDIENTS
FOR THE CAKE :
- Unsalted butter, softed, not melted – 170g
- Sugar – 170g
- All purpose flour – 115g
- Cocoa powder – 55g
- Baking powder – 1tsp
- Large Eggs – 3
- Milk – 2 tbsp (optional)
- pinch of salt
FOR THE SUGAR SYRUP :
- Sugar – 1/4 cup
- Water – 1 cup
FOR THE WHIPPING CREAM :
- Dreamwhip – 2 sachet
- Cold Milk – 1 cup
- Vanilla Essence – 1tsp
FOR THE GANACHE :
- Semisweet or bittersweet chocolate, cut into small pieces – 8 ounces (227 grams)
- Heavy whipping cream – 3/4 cup (180 ml)
- Unsalted butter – 1 tablespoon (14 gram)
METHOD
TO PREPARE THE CAKE PAN :
Butter a cake pan and sprinkle about 1 tbsp of flour. Gently toss the pan so that all sides are coated with flour.
TO MAKE THE CAKE :
- Powder the sugar finely.
- Beat the butter using the handmixer for about 1 minute till it is soft.
- Add powdered sugar to butter and beat on high speed till it becomes creamy.
- Add the eggs one by one and beat well on high speed for around 10 minutes .
- In another bowl, sieve the flour, baking powder and cocoa powder.
- Add one third of the flour, cocoa mixture with the egg mixture . Stir with a spoon till it is well blended. Repeat this 2 more times till the all of the flour mixture is incorporated into the egg mixture.
- You should have a smooth thick batter. If your batter is thick , add about 2 tbsp of milk and stir.
- Pour the batter into the pan . The batter should fill only till 2/3 rd of the pan . Bake at 180 degree for around 25 minutes .
- To test whether the cake is done, insert a tooth pick. If the tooth pick comes out clean ( without any crumbs on it) , then the cake can be taken out of the oven .
- Let the cake cool to room temperature before applying icing.
TO MAKE THE SUGAR SYRUP:
Stir the sugar, water and essence in a small saucepan and bring to boil. Simmer till the sugar has dissolved, and cool completely.
TO MAKE THE WHIPPING CREAM:
Mix the contents in 2 small sachets of Dreamwhip with 1 cup cold mix and a teaspoon of vanilla essence. Beat on high speed for 5-7 minutes till you get light fluffy peaks. This will give about 4 cups whipped cream.
TO MAKE THE GANACHE :
- Place the chopped chocolate in a medium sized stainless steel, or heatproof bowl. Set aside
- Heat the cream and butter in a medium sized saucepan over medium heat. Bring just to a boil.
- Immediately pour the boiling cream over the chocolate and allow to stand for 5 minutes. Stir until smooth.
- When Ganache has completely cooled, beat until soft and fluffy. Then spread the frosting on top of the cake.
HOW TO ASSEMBLE :
- When the cake is cooled, use a long serrated knife and cut off the top to make it straight. Slice the cake horizontally into 2 or 3 equal parts..
- Pour one-third of the sugar syrup on the first cake layer .
- Spread the whipping cream over the first layer.
- Take the second cake slice on top of the first layer . Pour one third of the sugar syrup and spread the whipped cream.
- Repeat the process with the third layer.
- Cover the whole cake with whipping cream.
- Pour the ganache over the top of the cake and spread it . Spread the ganache to the sides of the cake .
- Stick Kit Kat’s all the way around the cake – they will just stick to the frosting. Pour M&M’s on the top to give the finishing touch.
- Refrigerate for 2 hours so that the kitkat gets glued to the cake.
Note :
- Eggs, butter and milk should be at room temperature
- Mix in flour and milk to the batter using a wooden spoon, do not use beater.


