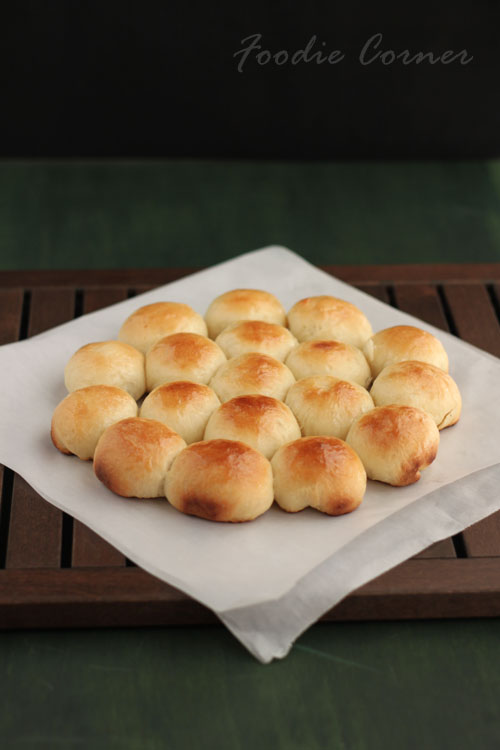
Khaliat Nahal (Honeycomb Buns or Bee’s Hive Buns)

 IMG_7632

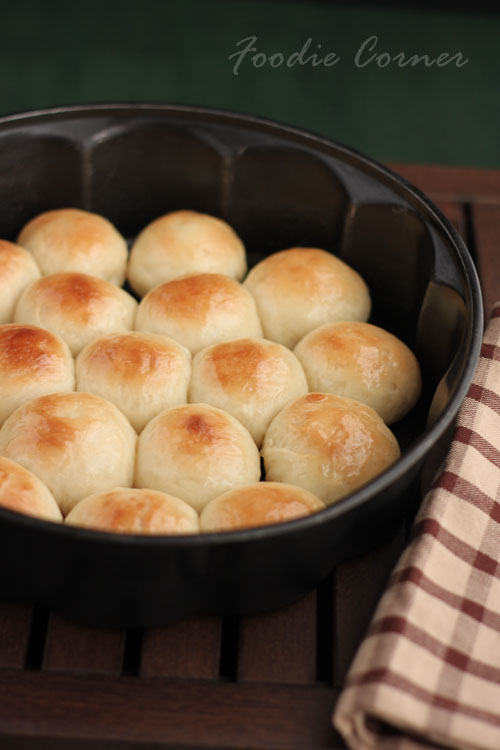
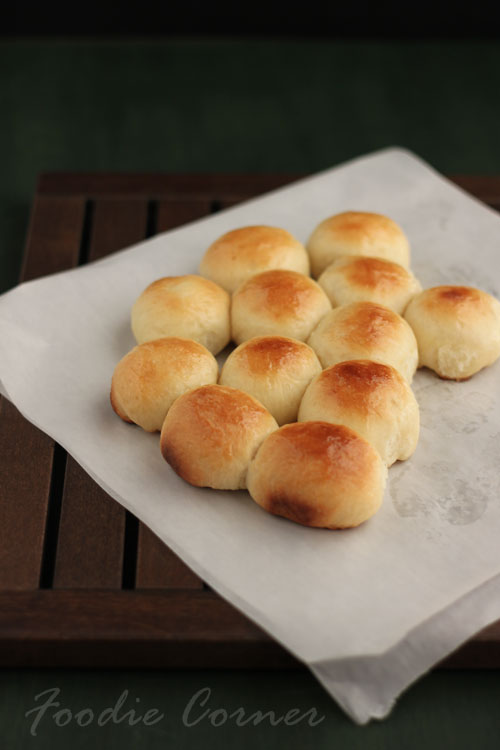
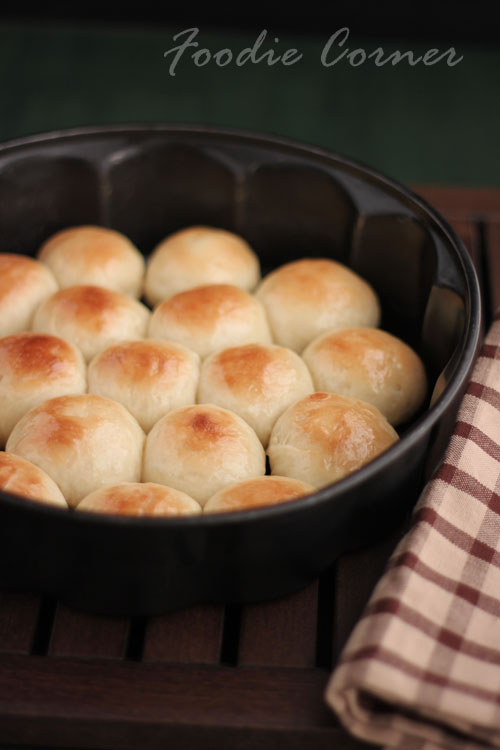
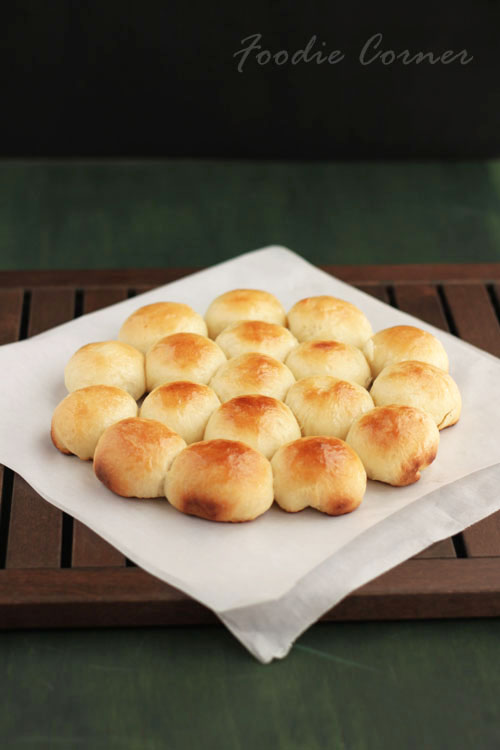
 For October’s We Knead to Bake Aparna had selected  Khaliat Nahal or Honeycomb Buns .  Khaliat al Nahal (also known as Khaliat Nahal) translates as Bee’s Hive in Arabic. This is because the buns are baked close to each other in a round pan where they form a honeycomb like pattern. They’re traditionally made sweet and glazed with honey flavoured syrup, though savoury versions are also made.

 This recipe makes 18 smallish buns, and if you want fewer you can halve the recipe to make about 9 or 10 buns. For half the recipe, use a 6” or 7” round cake tin to bake the Honeycomb Bread.  You can also bake them individually in muffin tins if you prefer, except they would not have their characteristic “honeycomb” pattern.

IMG_7612

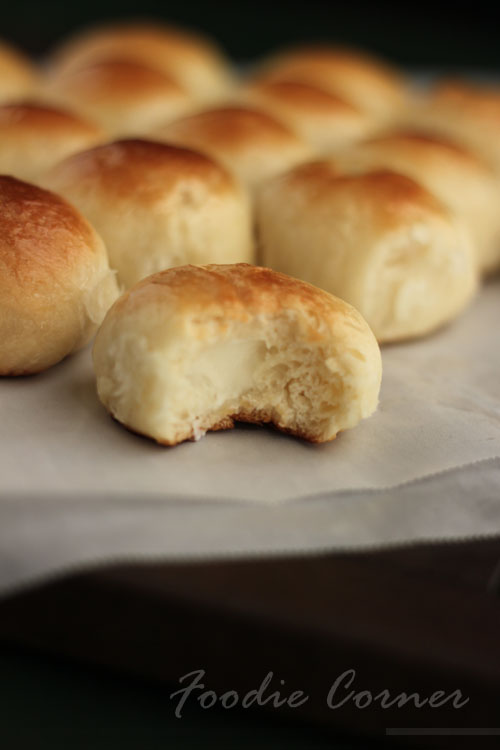
Traditionally, the filling used in this bread is a small piece of plain cream cheese but here choice of filling is entirely up to you. You can make it sweet or savoury.

IMG_7648

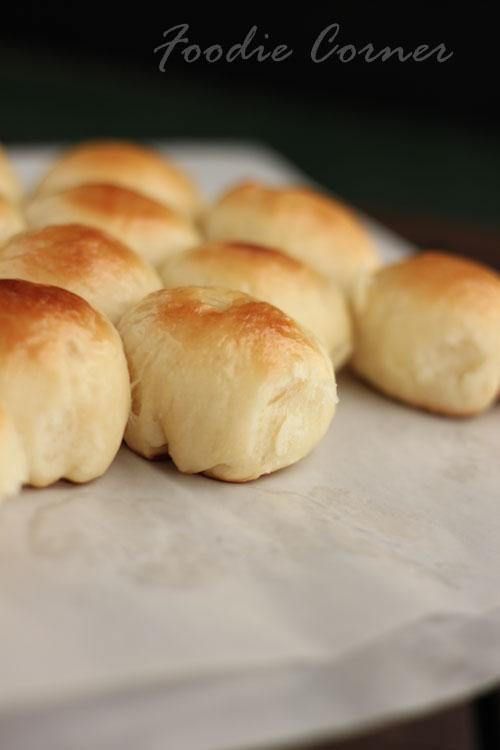
   This is by far the softest bread I have ever made !!! And the kids really loved it … The bread disapperared real fast 🙂

IMG_7655 IMG_7656

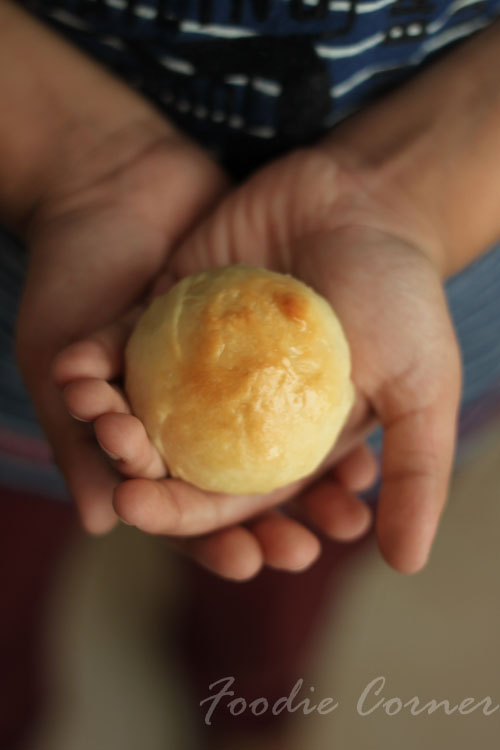
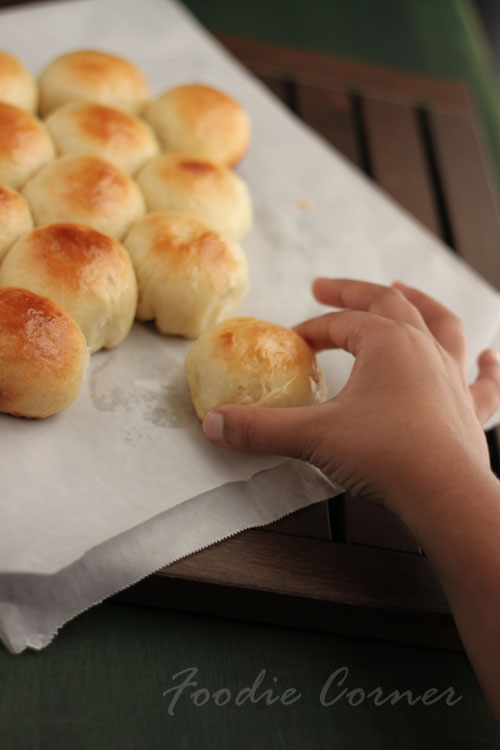
My little one was so impatient to have the bread that he couldn’t wait till my photosession was over 🙂

Hubby too was real impressed but he wanted it to be a savoury filling the next time.. And I obliged by baking him a savoury version with chicken keema filling the next day 🙂

IMG_7659

INGREDIENTS

FOR THE DOUGH

  • 1 cup lukewarm milk
  • 1 1/2 tsp instant yeast
  • 1 tsp sugar
  • 2 1/2 cups all-purpose flour
  • 3 tbsp sugar (for sweet bread)
  • 3/4 to 1 tsp salt (for savoury bread) OR 1/4 tsp salt (for sweet bread)
  • 40gm butter, melted
  • 2 tbsp milk for brushing the dough
  • 2 tbsp white sesame seeds for sprinkling on top (optional; only for savoury bread)

FOR THE FILLING

1 cup of filling (approximately) of your choice, either sweet or savoury

Savoury – cream cheese OR crumbled feta cheese OR crumbled paneer/ cottage cheese, flavoured according to your choice. You can also use any other savoury filling that you want. I used a combination of crumbled paneer, herbs, chilli flakes, a little garlic and chopped spring onion.

Sweet – cream cheese (traditional filling), or any other filing of your choice like chocolate,   dried fruit like dates, raisins, chopped nuts, chopped fruit , sweetened coconut filling, etc.

Sugar Syrup/ Glaze:

  • 3/4 cup sugar
  • 1/2 cup water
  • A pinch of saffron
  • 1 tbsp honey
  • 1 tsp lime/ lemon juice
  1. Make sure your melted butter has cooled down a bit before using it. Put 2 cups of the flour, salt, sugar (if making the sweet bread only) and melted butter in the bowl of your processor. Run a couple of times to mix well.
  2. Combine the milk, sugar and yeast in a small bowl and keep for 5 minutes. Add this to the processor bowl and knead until you have a smooth and elastic dough which is not sticky. Add as much of the remaining 1/2 cup of flour as you need to get this consistency of bread dough.
  3. Shape the dough into a ball and place it in a well-oiled bowl, turning it to coat completely with the oil. Cover and let it rise till double in volume, for about an hour.
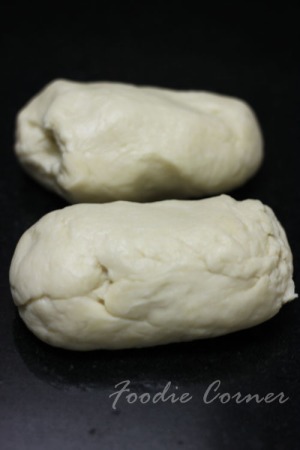
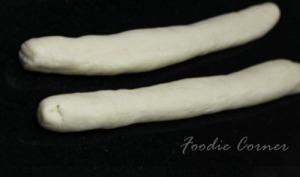
IMG_75584. Turn the dough out onto your work surface. You won’t really need to flour it as the dough is quite manageable as it is. Cut it into 2 halves. With your palms, roll out each half a “rope” about 9” long.
IMG_7574
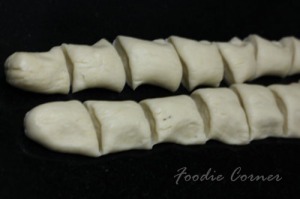
5. Cut each rope into 1” pieces so you have a total of 18 pieces.
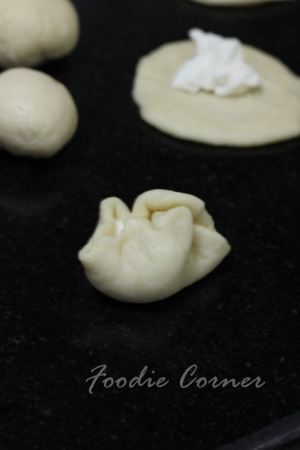
IMG_75756. Take each piece and flatten it out a little and place half a teaspoon of filling in the centre.
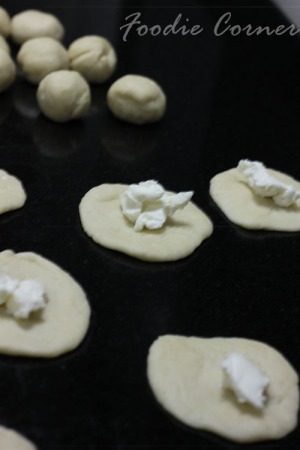
IMG_75907. Pull up the sides and wrap the dough around the filling, pinching it closed at the top. Smoothen it into a round ball.

IMG_7592

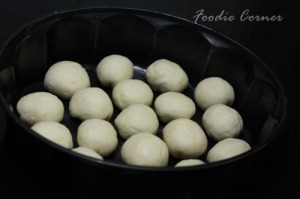
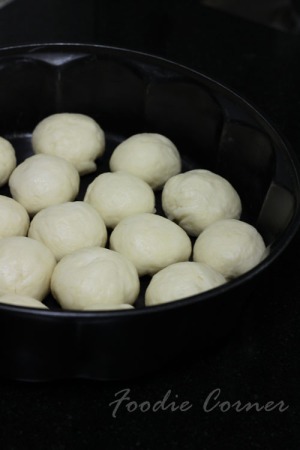
8. Place this in a well-greased round 9” cake tin. Repeat with the remaining 17 pieces and the filling. Arrange the filled balls of dough in concentric circles, filling the base of the cake tin.

IMG_7593

9. Cover with a kitchen towel and let it rise for about 30 to 40 minutes. Brush the tops with milk and sprinkle the sesame seeds over this. Don’t use the sesame seeds for sweet bread, only for the savoury one. Bake the buns at 180C (350F) for about 25 minutes, until they’re done and a nice golden brown on top.

IMG_7599

10. If you’re making the sweet version, make the sugar syrup/ glaze during the first rise of the dough. For this put the sugar, water and saffron in a small pan and bring to a boil. Turn down the heat and let it simmer for a few minutes until it starts thickening a bit. Take it off the heat and add the honey and the lime/ lemon juice. Mix well and let it cool. Keep aside till needed.

11. When the sweet buns come out of the oven, pour the syrup all over the top of the “Honeycomb”.  The bread should be hot and the syrup/ glaze should be cool. If you want your Honeycomb Buns to be less sweet, just brush the syrup/ glaze over the top. ( I skipped the honey in the recipe as kids do not prefer honey’s taste )

IMG_7609

12. Let it sit for a while for the syrup/ glaze to set a bit. Serve them warm with tea/ coffee.

IMG_7653

IMG_7632bright

Here’s a good video to watch in case you think you need it.  http://xawaash.com/?p=6593#sthash.WYkAg0DL.dpbs


Torcettini di Saint Vincent – Yeasted Cookies

IMG_5540

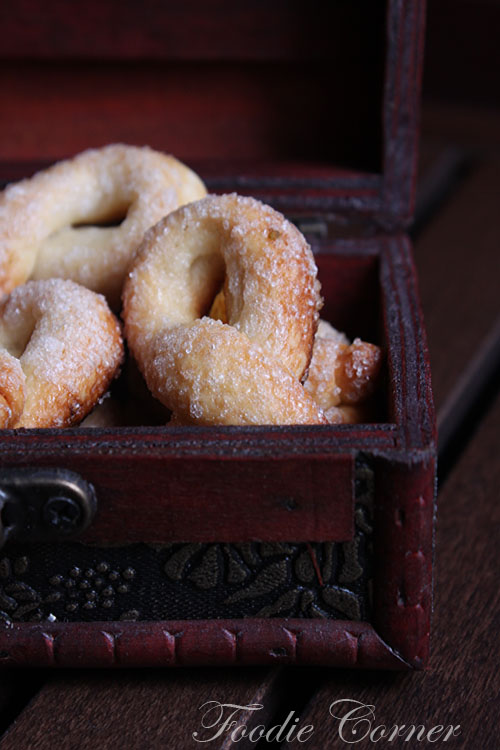
This month’s challenge of ‘We Knead to Bake’ is something new to me – yeasted cookies !! Never knew cookies can be made using yeast.. These are not overly sweet , just perfect with a cup of tea !! The one thing I love about baking is the excitement kids have when they get the aroma of ‘something special’ from the kitchen oven !!

The recipe doesn’t have  much long procedures. Mix the flour , butter and yeast to make a dough and let it rise ( I left mine overnight in fridge) .. Then take small portions out of the dough ,roll each of then into a rope shape and twist to form the loop . Coat them with sugar , let them rise again and bake .

Torcettini are smaller versions of Torcetti (meaning small twists), and these pear/ teardrop shaped twists are made of a dough of flour, yeast and butter which are shaped and then rolled in sugar before being baked. These biscuits are synonymous with the town of Saint Vincent in Valle d’Aosta, a small mountainous region in North-Western Italy.

IMG_5435

Torcettini di Saint Vincent

(Adpated from A Baker’s Tour by Nick Malgieri)

Ingredients:

  •  1/2 cup warm water, about 110F
  •  1 1/4 tsp active dry yeast (or 1 tsp instant yeast)
  •  1 1/2 cups all-purpose flour
  • 2 tbsp cocoa powder (if making chocolate torcettini)
  • 1/4 tsp salt
  • 1 tsp lime/ lemon zest (replace with orange zest for the chocolate version)
  •  40gm unsalted butter, cold and cut into small pieces
  •  about 1/3 cup sugar for rolling the cookies

collge1

Preparation

  1. Dissolve the yeast in the warm water, in a small bowl and keep aside.
  2. Put the flour and the salt in the food processor bowl (or a largish regular bowl if kneading by hand) and pulse a couple of times to mix. Add the butter pieces and pulse until the butter is well mixed and the flour-butter mixture looks powdery.
  3. If making chocolate Torcetti, remove 2 tbsp all-purpose flour and add the 2 tbsp unsweetened cocoa powder mentioned in the recipe. Don’t add the lemon zest/ anise. Use orange zest and maybe add 1/ 2 tsp instant coffee powder with the flour.
  4. Add the yeast-water mixture and pulse till it all comes together as a ball. Do not over process or knead. Place the ball of dough in a oiled bowl, turning it so it is well coated with the oil. Cover the bowl, and let the dough rise quite a bit.
  5. This dough does not really double in volume, but it should look “puffy” after about an hour or so. When you pinch off a bit from the top you can see the interior looking a bit like honeycomb. Press down the dough and deflate it, wrap it in cling warp and refrigerate it for at least one hour or up to 24 hours.
  6. When ready to make the cookies, take the dough out and lightly roll it out into an approximately 6” square. If the dough feels sticky, scatter a little sugar on it. Using a pizza wheel cut the dough into four strips of equal width. Cut each strip into 6 equal pieces, by cutting across, making a total of 24 pieces. The measurements are not very critical in this part because this just makes it easier to have 24 equal sized bits of dough, as compared to pinching of bits of the dough.
  7. Roll each piece into a pencil thick “rope” about 5” long. Sprinkle a little sugar on your work surface and roll the “rope” in it so the sugar crusts the dough uniformly. Form the “rope” into a loop crossing it over before the ends.
  8. Place the Torcettini on parchment lined baking sheets, leaving 1 1/2″ between them. Leave them for about 20 minutes or so till they rise/ puff up slightly. Don’t worry, they will not “puff up” much.
  9. Bake them at 160C (325F) for about 25 minutes till they’re a nice golden brown. Cool the cookies completely, on a rack. Store them in an air-tight container at room temperature. Although, I found them best the day they were baked. This recipe makes 24 biscuits.

IMG_5588

They are delicious served warm and equally good cold, and keep very well if stored in airtight containers.

Nazook – Daring Baker’s Challenge

Bogged down by flu and backpain.. Result – A very late Daring Bakers Challenge post. But I sooo much loved  the Nazook – an Armenian flaky pastry with a sweet filling –  that I had to post it.

The Daring Bakers’ April 2012 challenge, hosted by Jason at Daily Candor, were two Armenian standards: nazook and nutmeg cake. Nazook is a layered yeasted dough pastry with a sweet filling, and nutmeg cake is a fragrant, nutty coffee-style cake.

I was hearing the name Nazook for the first time and after seeing the wonderful reviews in the Daring Bakers forum , decided to give it a try.. and am glad that I did!!! The dough making part is easy – the interesting thing is the addition of sour cream . One mistake I did was I forgot  to refrigerate the dough, which made it loosen a bit more than it was supposed to be.. Adding a bit more flour helped to handle the dough. But the second time I made it (yes, I loved this pastry so much that I made a second batch ) the refrigerated dough was easy to work with and the pastry looked a bit more perfect.

While the Nazook was in the oven hubby came back from office and said the house smelled like a bakery !!! And he was getting impatient with my photo session , so finally suggested – why don’t you take a snap showing me having one of these?? 🙂 So I went on clicking while he could have a piece , without having to wait for my never ending photo session 🙂

Kids have been asking to bake something for them with chocolate for quite some time. I wanted to try the filling with some pistachios but keeping the kids’ request in mind, made half of the batch with chocolate chips… And yes, they too loved the Nazook and the pastry disappeared quickly 🙂

Though the recipe looks like lengthy process  – it is quite easy to make these.. and the dough is easy to work with (just don’t forget the refrigerating part).. So go ahead and try these , I am sure you will love them !!!

Recipe

Yields 40 pieces

Ingredients
Pastry dough

  • 3 cups  all-purpose (plain) flour, sifted
  • 2½ teaspoons (1 packet) active dry yeast
  • 1 cup (240 ml)  sour cream
  • 1 cup (2 sticks) softened butter (room temperature)

Filling

  • 1 1/2 cups all-purpose (plain) flour, sifted
  • 1 1/2 cups sugar
  • 3/4 cup (1½ sticks) softened butter (room temperature)
  • 2 teaspoons (10 ml) vanilla extract

Wash

  • 1-2 egg yolks (for the wash; alternatively, some yogurt, egg whites, or a whole egg)

Directions:

Make the Pastry Dough
1. Place the sifted flour into a large bowl.
2. Add the dry yeast, and mix it in.
3. Add the sour cream, and the softened butter.
4. Use your hands, or a standing mixer with a paddle attachment, to work it into a dough.
5. If using a standing mixer, switch to a dough hook. If making manually, continue to knead for about 10 minutes, or until the dough no longer sticks to the bowl or your hands. If it remains very sticky, add some flour, a little at a time.
6. Cover the dough and refrigerate for 3-5 hours, or overnight if you like.

Make the filling
7. Mix the flour, sugar, and the softened butter in a medium bowl.
8. Add the vanilla extract.
9. Mix the filling until it looks like clumpy, damp sand. It should not take long. Set aside.

Make the nazook
10. Preheat the oven to moderate 350°F/175°C/gas mark 4.
11. Cut the refrigerated dough into quarters.
12. Form one of the quarters into a ball. Dust your working surface with a little flour.
13. Roll out the dough into a large rectangle or oval. The dough should be thin, but not transparent.
14. Spread 1/4 of the filling mixture across the rolled-out dough in an even layer. Try to spread the filling as close as possible to the edges on the short sides, but keep some of pastry dough uncovered (1 inch/2.5 cm) along the long edges.
15. From one of the long sides, start slowly rolling the dough across. Be careful to make sure the filling stays evenly distributed. Roll all the way across until you have a long, thin loaf.
16. Pat down the loaf with your palm and fingers so that it flattens out a bit (just a bit).
17. Apply your egg yolk wash with a pastry brush.
18. Use your crinkle cutter (or knife) to cut the loaf into 10 equally-sized pieces. Put onto an ungreased cookie sheet.
19. Place in a preheated moderate oven for about 30 minutes, until the tops are a rich, golden brown.
20. Allow to cool and enjoy!

Yeasted Filled Meringue Coffee Cake

This was my first Daring Baker challenge. To be honest I was nervous as I read through the challenge , unsure whether it would come out well…  For a few days I kept on going through the recipe and the discussion forum where the fellow Daring Bakers had posted their successful results…  Well , after a few days I summoned up the courage to get going.. The filling for the coffee cake could be anything of our choice and I decided it would be pistachios for mine , as they would complement the chocochips in taste and visual appeal 🙂 …

As I was rolling out the first meringue, I thought of adding dates to the second coffee cake along with  the pista and nuts… again I was not sure how it would turn out, but went ahead with my instinct..

Apart from the  minor mishap of filling the meringue till the end of the rolled dough which made it a bit difficult in joining the ends together and keeping away the over enthusiastic kids from the chocolate filled dough kept for rising 🙂  the rest of the process went smoothly …

And the coffee cakes looked beautiful and was soft in texture :)… The kids loved the pista and chocochips version… I loved the dates with the chocolate…Hubby dear thought it was from the bakery 🙂 .. hmm all in all, it was worth the effort .. Thank you Daring Bakers for giving this wonderful challenge… and to my bro once again for the beautiful snaps in this post…

The March 2011 Daring Baker’s Challenge was hosted by Ria of Ria’s Collection and Jamie of Life’s a Feast. Ria and Jamie challenged The Daring Bakers to bake a yeasted Meringue Coffee Cake.

Makes 2 round coffee cakes, each approximately 10 inches in diameter
The recipe can easily be halved to make one round coffee cake

Ingredients
For the yeast coffee cake dough:

4 cups (600 g / 1.5 lbs.) flour
¼ cup (55 g / 2 oz.) sugar
¾ teaspoon (5 g / ¼ oz.) salt
1 package (2 ¼ teaspoons / 7 g / less than an ounce) active dried yeast
¾ cup (180 ml / 6 fl. oz.) whole milk
¼ cup (60 ml / 2 fl. oz. water (doesn’t matter what temperature)
½ cup (135 g / 4.75 oz.) unsalted butter at room temperature
2 large eggs at room temperature

For the meringue:

3 large egg whites at room temperature
¼ teaspoon salt
½ teaspoon vanilla
½ cup (110 g / 4 oz.) sugar

For the filling:

1 cup (110 g / 4 oz.) chopped pistachios
2 Tablespoons (30 g / 1 oz.) granulated sugar
¼ teaspoon ground cinnamon
1 cup (170 g / 6 oz.) semisweet chocolate chips or coarsely chopped chocolate

For the dates paste in filling : (for 1 coffee cake)

10 dates pitted and chopped
1 tbsp butter
1/4 cup water
1-2 tbsp sugar

Egg wash: 1 beaten egg
Cocoa powder (optional) and confectioner’s sugar (powdered/icing sugar) for dusting cakes

Directions:

Prepare the dough:

In a large mixing bowl, combine 1 ½ cups (230 g) of the flour, the sugar, salt and yeast.

In a saucepan, combine the milk, water and butter and heat over medium heat until warm and the butter is just melted. Ria’s version: add the 10 saffron threads to the warmed liquid and allow to steep off of the heat for 10 minutes. This will give the mixture a distinct aroma and flavor and a yellowish-orange hue.

With an electric mixer on low speed, gradually add the warm liquid to the flour/yeast mixture, beating until well blended. Increase mixer speed to medium and beat 2 minutes. Add the eggs and 1 cup (150 g) flour and beat for 2 more minutes.

Using a wooden spoon, stir in enough of the remaining flour to make a dough that holds together. Turn out onto a floured surface (use any of the 1 ½ cups of flour remaining) and knead the dough for 8 to 10 minutes until the dough is soft, smooth, sexy and elastic, keeping the work surface floured and adding extra flour as needed.

Place the dough in a lightly greased (I use vegetable oil) bowl, turning to coat all sides. Cover the bowl with plastic wrap and a kitchen towel and let rise until double in bulk, 45 – 60 minutes. The rising time will depend on the type of yeast you use.

Prepare your filling:In a small bowl, combine the cinnamon and sugar for the filling .

For the dates paste : Heat a pan and add 1 tbsp of butter. When it melts add the pitted and chopped dates. Add 1/4 cup water and let it boil. Stir till the dates get mashed. Add 1-2 tbsp of sugar depending on your taste.

Once the dough has doubled, make the meringue:
In a clean mixing bowl – ideally a plastic or metal bowl so the egg whites adhere to the side (they slip on glass) and you don’t end up with liquid remaining in the bottom – beat the egg whites with the salt, first on low speed for 30 seconds, then increase to high and continue beating until foamy and opaque. Add the vanilla then start adding the ½ cup sugar, a tablespoon at a time as you beat, until very stiff, glossy peaks form.

Assemble the Coffee Cakes:

Line 2 baking/cookie sheets with parchment paper.

Punch down the dough and divide in half. On a lightly floured surface, working one piece of the dough at a time (keep the other half of the dough wrapped in plastic), roll out the dough into a 20 x 10-inch (about 51 x 25 ½ cm) rectangle. Spread half of the meringue evenly over the rectangle up to about 1/2-inch (3/4 cm) from the edges. Sprinkle half of  the chopped pistachios and half of the chocolate chips of the filling of choice evenly over the meringue

Now, roll up the dough jellyroll style, from the long side. Pinch the seam closed to seal. Very carefully transfer the filled log to one of the lined cookie sheets, seam side down. Bring the ends of the log around and seal the ends together, forming a ring, tucking one end into the other and pinching to seal.

Using kitchen scissors or a sharp knife (although scissors are easier), make cuts along the outside edge at 1-inch (2 ½ cm) intervals. Make them as shallow or as deep as desired but don’t be afraid to cut deep into the ring.

Repeat with the remaining dough, meringue and fillings.

Cover the 2 coffee cakes with plastic wrap and allow them to rise again for 45 to 60 minutes.

Preheat the oven to 350°F (180°C).

Brush the tops of the coffee cakes with the egg wash. Bake in the preheated oven for 25 to 30 minutes until risen and golden brown. The dough should sound hollow when tapped.

Remove from the oven and slide the parchment paper off the cookie sheets onto the table. Very gently loosen the coffee cakes from the paper with a large spatula and carefully slide the cakes off onto cooling racks. Allow to cool.

Just before serving, dust the tops of the coffee cakes with confectioner’s sugar as well as cocoa powder if using chocolate in the filling. These are best eaten fresh, the same day or the next day.